In a world filled with power tools and high-tech equipment, the simple marking gauge often goes unnoticed. But don’t let its unassuming appearance fool you—this tool is indispensable in any hand-tool woodworking shop. A marking gauge allows you to create uniform surfaces, transfer measurements precisely, and replicate measurements across multiple pieces with ease. It’s a subtle workhorse that can transform the way you work with wood.
What is a Marking Gauge? An Essential Tool for Precision
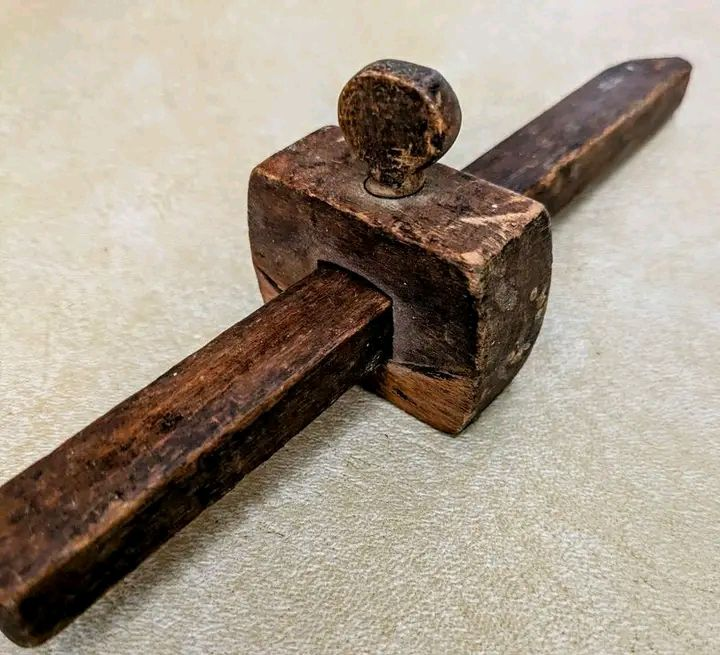
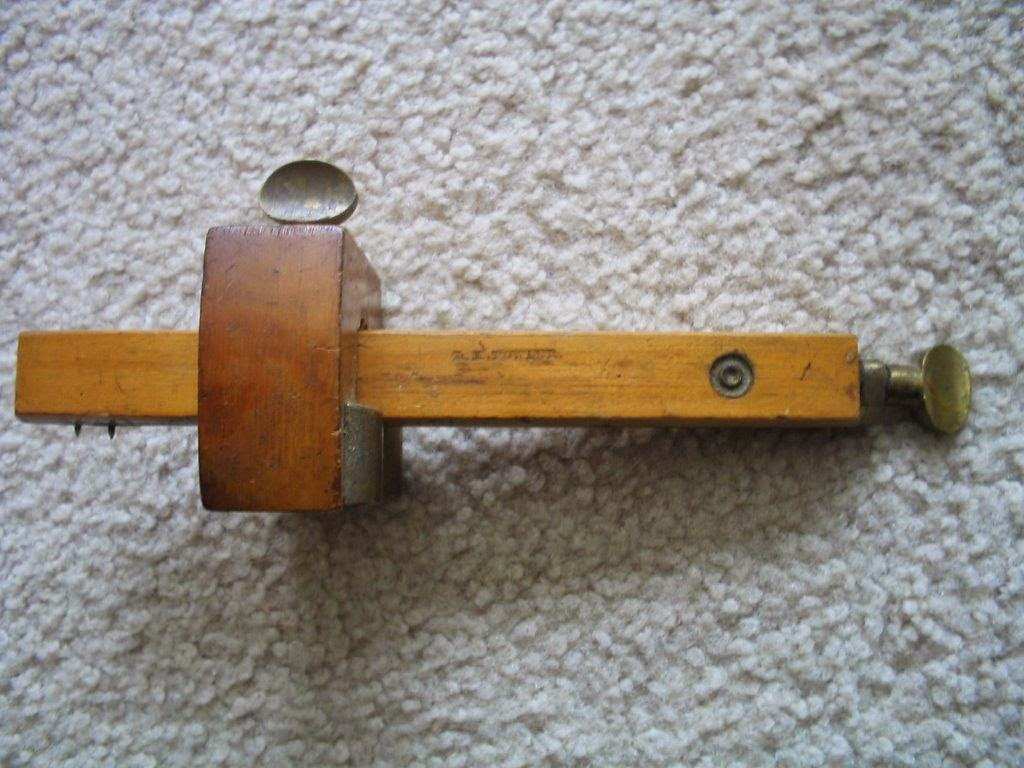
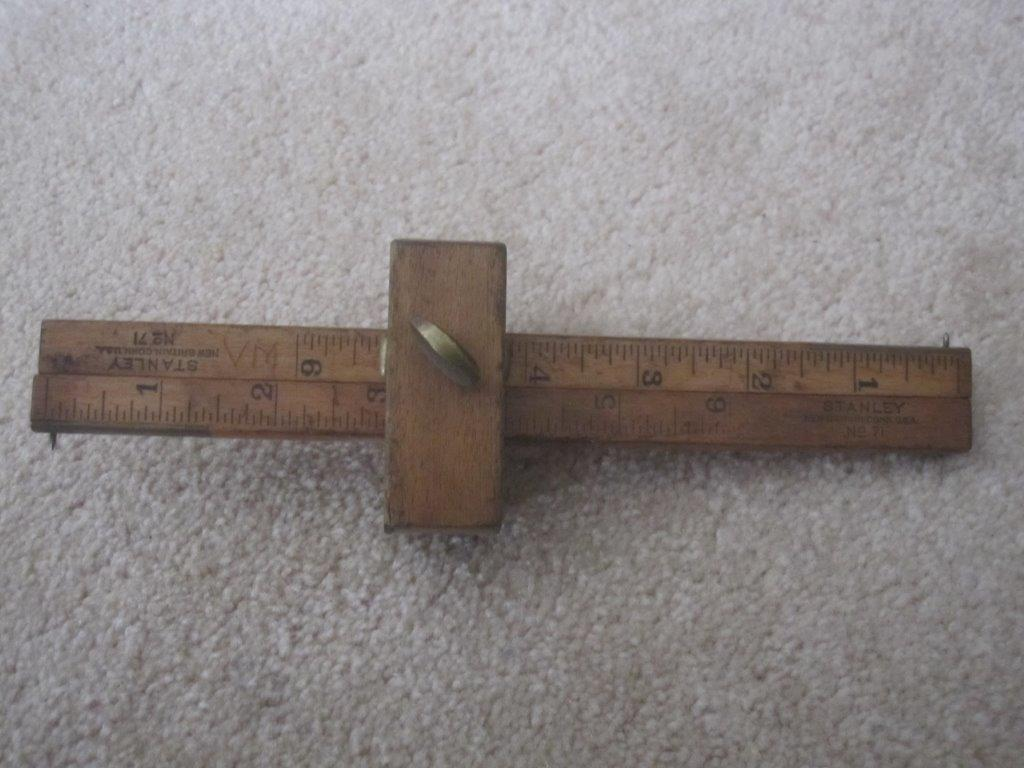
At its core, a marking gauge is a woodworking tool designed to scribe a line parallel to a reference edge, often to mark out for a cut or a joint. This line serves as a guide, helping you achieve accurate cuts and consistent measurements throughout your project. The marking gauge typically consists of an adjustable arm and a sharp pin or blade that scores the wood as it’s dragged along the surface.
While modern woodworking tools may have taken the spotlight, the marking gauge holds a special place in traditional woodworking and is still widely used by craftsmen who appreciate precision and the art of hand-tool work.
The 18th-Century Origins and Evolution of the Marking Gauge
Marking gauges have a long and storied history, with records of their use dating back to the 18th century. Tool inventories from this period reveal that woodworkers often bought marking-gauge pins separately to create their own gauges. Unlike today’s mass-produced versions, these handcrafted gauges were often superior in quality and tailored to fit the specific needs of each woodworker.
Many traditional gauges, such as the Seaton gauge found in the 18th-century tool chest of Benjamin Seaton, feature elements like a captive wedge for one-handed adjustments and a comfortable head shape for precise control. These features are often missing in modern gauges, but they offer significant benefits that can improve the woodworking experience.
Building Your Own Marking Gauge: A Step-by-Step Guide
If you’re interested in making a marking gauge of your own, look no further. Crafting one by hand allows you to tailor the gauge to your needs and even improve upon the basic design. Here’s how you can create a gauge inspired by the classic French gauge design.
Step 1: Choose Your Materials
Select a wood type that’s durable but easy to work with. Traditional woods for marking gauges include beech and birch, but hardwoods like maple, cherry, or mahogany work well, too. You’ll need:
- 6/4 stock for the head
- 4/4 straight-grained stock for the arm
- 4d finishing nails or brads for the pins, or you can use 5/64” twist drill bits for longer-lasting, sharper pins
Step 2: Shape the Arm and Head
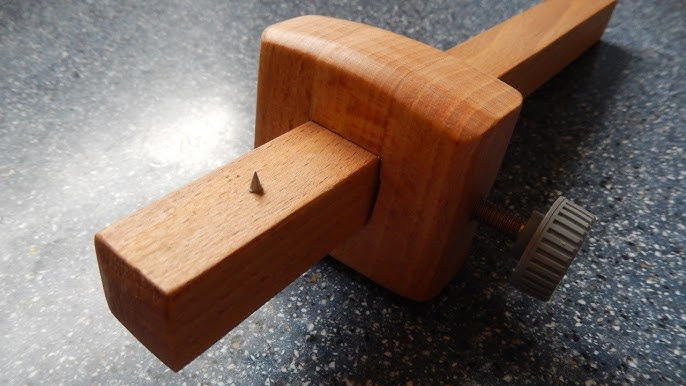
Cut the arm to the length that best fits your tool chest or storage area, keeping in mind that a shorter arm is more convenient for small tool trays. Shape the head of the gauge to fit comfortably in your hand, and add a bevel to the bottom for easy maneuvering. This bevel allows you to slide the gauge forward or backward smoothly when you’re ready to make a mark.
Step 3: Assemble and Attach the Pins
Attach the pins to the arm, ensuring they are slightly set back from the edge. This allows the pin to trail behind the arm while marking, giving you better control over the depth and angle of the cut. For the best results, shape the pins like tiny knives to create crisp, precise lines, and attach them at a slight angle to prevent perpendicular pressure on the wood.
Step 4: Fit the Captive Wedge
The captive wedge is an essential feature of the Seaton gauge, allowing one-handed operation. To incorporate this, cut a small wedge that can lock the gauge head in place. A tap with your thumb will lock the head, while a tap on the opposite side will release it. This simple mechanism allows for fast, easy adjustments.
Using the Marking Gauge: Techniques for Accurate Lines
Once your marking gauge is ready, you’ll want to know how to use it for optimal results. While it may seem like a straightforward tool, there are specific techniques that can enhance your accuracy and efficiency.
Marking Long Grain and Cross Grain
To create a long-grain mark, start by lightly engaging the pin with the wood, dragging it along with gentle pressure. This method creates a shallow, initial scribe that can be deepened with additional passes if necessary. When working across the grain, reduce the pressure to avoid tear-out. Use a low angle of attack for cross-grain marking, even if your pins are shaped like small knives. A softer touch will keep the wood’s fibers intact while still providing a clear, visible line.
Using Wrist Rolling for Mortise Marks
When marking for mortises, the wrist-rolling technique is particularly useful. Start by setting the gauge to the desired offset from the edge, and then lightly drag the pin across the wood. As you approach the ends of the mortise, roll your wrist to maintain consistent pressure, allowing the pin to follow the grain naturally. This technique speeds up marking and reduces the need for multiple adjustments.
Adjusting the Gauge with One Hand
One of the great advantages of a hand-built gauge with a captive wedge is the ability to adjust it single-handedly. By wrapping your hand over the head and letting your thumb control the wedge, you can lock and unlock the gauge quickly. This feature gives you greater freedom to focus on the workpiece rather than fussing with your tools.
The Advantages of a Hand-Built Marking Gauge
A marking gauge you build yourself can surpass commercial options in both quality and functionality. By customizing the dimensions and features, you create a tool that fits your hand perfectly and offers the flexibility to handle various tasks. Whether you need to scribe precise lines or transfer exact measurements, a handmade gauge provides a level of control that a mass-produced tool simply can’t match.
Modern Uses for the Traditional Marking Gauge
In the age of power tools, the marking gauge remains relevant, especially for woodworkers who appreciate precision and craftsmanship. It allows for:
- Replicating exact measurements on multiple pieces
- Creating uniform surfaces for cutting and shaping
- Enhancing accuracy in layout work, particularly for dovetails, mortises, and tenons
Despite its simplicity, the marking gauge’s effectiveness in creating straight, repeatable lines is unmatched. Even in a modern workshop, this tool’s ability to produce precise scribe lines ensures it has a place alongside more sophisticated equipment.
Conclusion: Embracing the Timeless Craft of the Marking Gauge
The marking gauge might seem like a modest tool, but it embodies centuries of woodworking tradition. It’s a simple yet powerful instrument that allows woodworkers to create accurate, consistent results without relying on complicated setups or measurements. Whether you choose to buy or build your own, the marking gauge is a valuable addition to any workshop.
So next time you set up for a project, consider using a marking gauge. Its practicality, ease of use, and precision remind us of a time when craftsmanship was key, and every tool had a purpose. In an age dominated by technology, tools like the marking gauge offer a refreshing connection to the roots of woodworking.